Working with Events
This section explains how to manage events in Alert Manager Enterprise (AME).
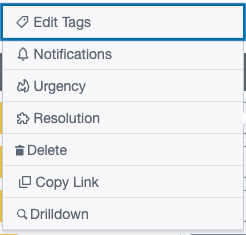
Event Actions
Event Actions can be found as Primary Actions for quick accessibility or as Secondary Actions under the three dots menu.
Primary Event Actions:
Secondary Event Actions:

Primary/Secondary Actions can be customized. See Event Summary Configuration
All status changes and comments are indexed as ame-audit-record entries and may trigger notifications.
Assigning an Event
To assign an event to a user:
- Click the assignee button from the actions.
- Select a user from the dropdown.
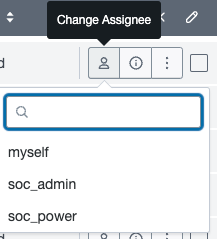
If a user’s Full Name is configured, it appears in the dropdown and as a tooltip in the Assignee column.
Only users with the tenant’s power user role appear as options.
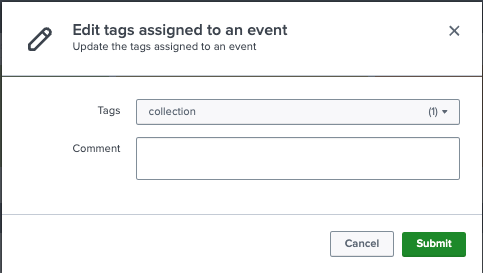
Editing Event Tags
To edit an event’s tags:
- Select
Edit Tagsbutton from the actions:
- Select or deselect tags and optionally add a comment:
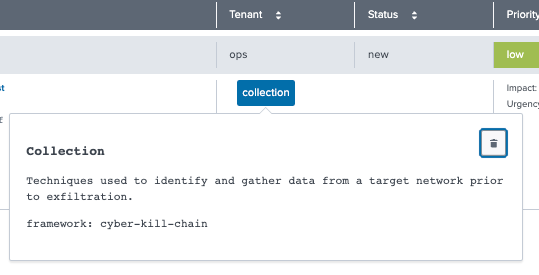
- Verify a tag by clicking it or remove it using the bin icon in the tag description:
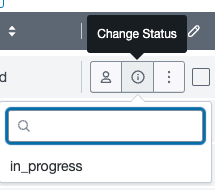
Updating the Status
To change an event’s status:
- Click the
Statusbutton from the actions. - Select the new status.
Updating the Notification Scheme
To update an event’s notification scheme:
- Click the
Notificationsbutton from the actions. - Choose a scheme to apply when the event’s status changes.
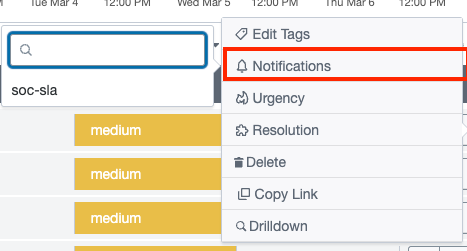
Only schemes accessible to the current power user for the event’s tenant are displayed.
- Add a comment and a resolution (optional) if the update requires explanation.
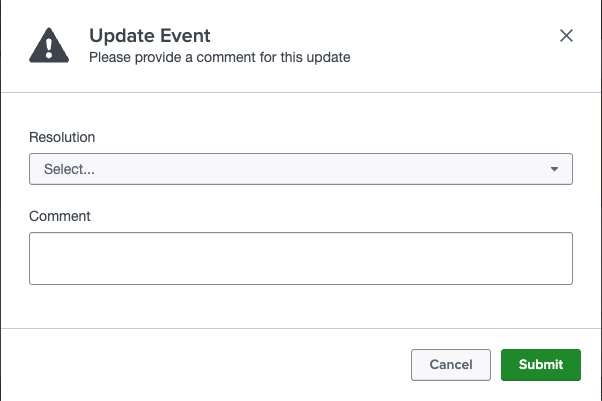
Comments are indexed as ame-audit-record entries and quoted in notifications.
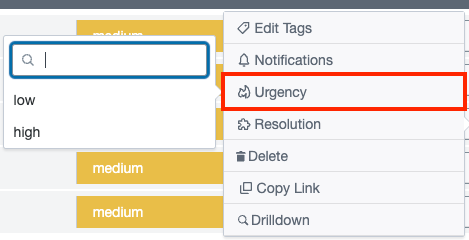
Updating the Urgency
To modify an event’s urgency:
- Click the
Urgencybutton from the actions. - Select the desired urgency level.
Updating the Resolution
To modify an event’s resolution:
- Click the
Resolutionbutton from the actions. - Select the desired resolution.
Delete an Event
To delete an event:
- Click the
Deletebutton from the actions. - Add a comment (optional) and confirm the deletion.
Only tenant admins can delete events.
Copy Link to Event
To copy the deep link to an event:
- Click the
Copy Linkbutton from the actions. - The link is now available in the clipboard.
Re-running the Original Search (Drilldown)
To re-run an event’s original search:
- Click the
Drilldownbutton from the actions.
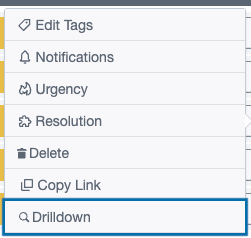
Results may be inaccessible if the current user lacks permissions for the original index.
Start Ticketing Integration
To manually start a ticketing integration:
- Click the
Ticketing Integrationbutton from the actions. - The ticketing integration will start in the background.
Adding a Comment
To add a comment:
- Click the
Commentbutton from the actions. - Enter a comment and confirm.
Update Event
To update multiple items of an event:
- Click the
Update Eventbutton from the actions. - A modal opens to update the following:
- Assignee
- Status
- Urgency
- Tags
- Notification
- Resolution
- Add a comment and press
Submit
Copy Event Data
To copy event data into the clipboard:
- Click the
Copy Event Databutton from the actions. - The event data is now available in the clipboard.
The format of the Event Data needs to be configured in the template. See Templates.
Adding a Comment with Markdown Preview
To comment on an event:
- Expand the event and open the
Commentstab:
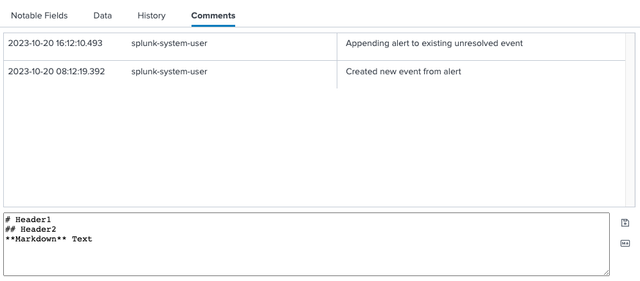
- Use these buttons to edit, preview, or save the comment:
| Button | Function |
|---|---|
 | Edit Raw Text |
 | Preview Formatted Text |
 | Save Comment |
Comments support Markdown formatting. Preview them with the Preview Formatted Text button:

Press Enter for a new line, or use Ctrl+Enter or Save Comment to save. Comments appear once indexed:
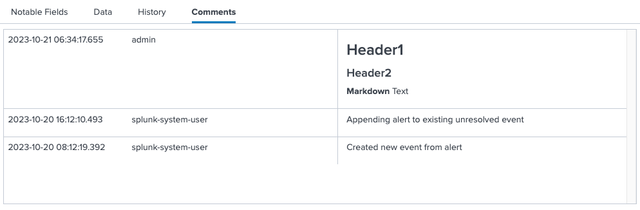
Indexed comments cannot be edited.
Bulk Actions
Select or deselect multiple events with these buttons:
| Button | Function |
|---|---|
 | Edit/Delete |
 | Reset Selection |
Update Events
- Check the boxes next to the events, then click
Edit/Deleteto open the menu:

- Choose an action (edit, comment) from the menu.
- Review the number of affected events by tenant, adjust attributes or add a comment, then confirm:
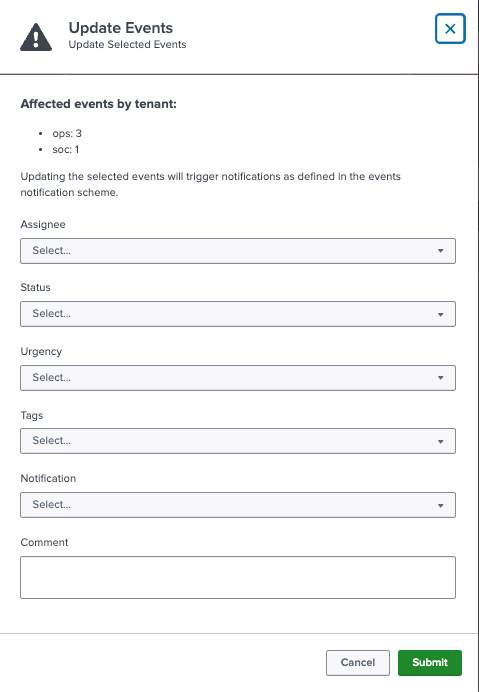
Only users belonging to the event’s tenant can be assigned; assignments to non-tenant users are skipped.
Delete Events
Events can be deleted by the tenant admin. All event data will be indexed in the tenant's index
Download Events
Event Data can be downloaded (exported). The data is exported in CSV format.
Invoking a Workflow Action
The following buttons are available in the context of Workflow Actions:
| Button | Function |
|---|---|
 | Run Workflow Action |
 | Show Action Fields |
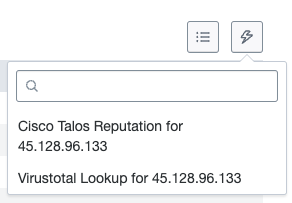
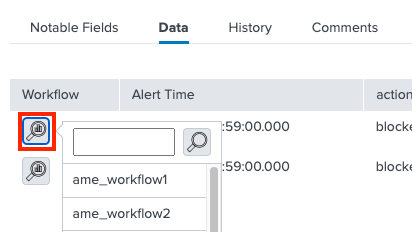
To run a Splunk Workflow Action on an event result:
- Expand the event and locate the action under the
Notable FieldsorDatatab. - Click the
Run Workflow Actionbutton:
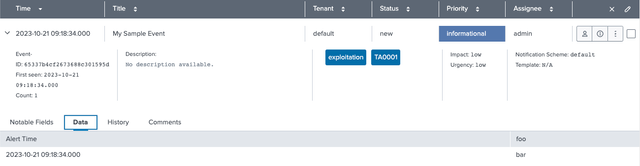
- Notable Fields tab example:
- Data tab example:
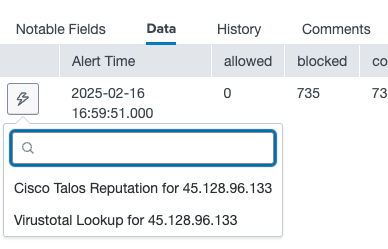
- Select the desired action from the dropdown to run the action
Workflow Actions are available if all required fields are present. Click on the Show Action Fields button under notables to show all available fields.
AME ignores the Show action in setting, applying all matching Workflow Actions.
On Splunk Cloud, only HTTPS-based Workflow Actions are permitted; HTTP actions are filtered out.
Examples
Example: Webhook Workflow Action
Following is an example of a Workflow action that triggers the built-in Splunk Webhook Action manually.
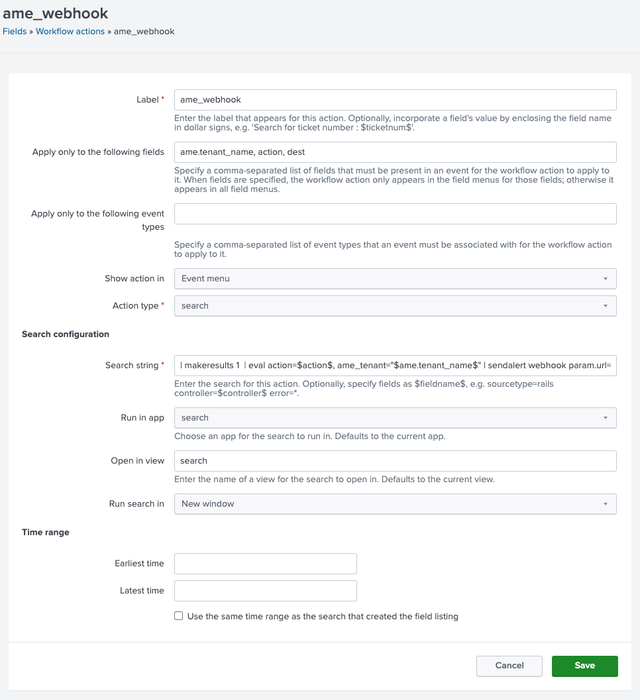
The search uses makeresults and eval to pass the tenant's name
ame.tenant_name and a result field action to the send alert command.
Depending on the alert action, various parameters can be set. In this case,
the destination web server URL is specified.
Full search command:
| makeresults 1
| eval action=$action$, ame_tenant="$ame.tenant_name$"
| sendalert webhook param.url="https://webserver:10000
When running the workflow action from the AME dropdown, the web server will receive a request as follows:
POST / HTTP/1.1
Accept-Encoding: identity
Content-Length: 226
Host: localhost:10000
Content-Type: application/json
User-Agent: Splunk/D1F702EF-402A-4659-A582-C88B3D7380EC
Connection: close

{"sid": "1679403559.11097", "search_name":"  ", "app": "search", "owner": "admin", "results_link": "https://<mysplunkserver>:8000/app/search/@go?sid=1679403559.11097", "result": {"_time": "1679403559", "ame_tenant": "Default Tenant"}
Filtering Workflow Actions
Workflow Actions are shown in AME when all fields in the
Apply only to the following fields settings that match.
The list of Workflow Actions can become very long, and not all actions are helpful
for an event.
It is possible to filter Workflow Actions further down using the name of the saved search, or by template.
The following attributes can be set in workflow_actions.conf:
[<workflowaction>]
ame_templates = [template_name|template_uid](,[template_name|template_uid])+
ame_savedsearches = savedsearch_name(,savedsearch_name)+
Examples
Example: Show workflowaction1 only to the mytest search1 and mytest search2
mytest search1 and mytest search2[workflowaction1]
ame_savedsearches = "mytest search1", "mytest search2"
Example: Hide workflowaction2 for all events
workflowaction2 for all events[workflowaction2]
ame_templates = ThisTemplateDoesNotExist
Manually Creating an Event
Sometimes, you may need to add an event not generated by a Splunk Alert. Use these buttons in the top-left corner of the Event Summary:
| Button | Function |
|---|---|
 | Create Event |
 | Test Query |
Click Create Event to open a modal:

Enter these fields (mandatory fields marked with *):
Title* - Event titleTenant* - Destination tenantImpact* - Event impactUrgency* - Event urgencyAssignee* - Event assigneeStatus* - Initial statusNotifications* - Notification schemeTags- Comma-separated tagsNotable Fields- Comma-separated fieldsEarliest- Earliest search timeLatest- Latest search timeQuery- Search query for re-runsFields- Key-value field list
Test the query by clicking Test Query (opens in a new tab), then click Submit to create the event:
Managing SLAs
Events can have SLAs assigned automatically or manually. View them in the SLA tab:
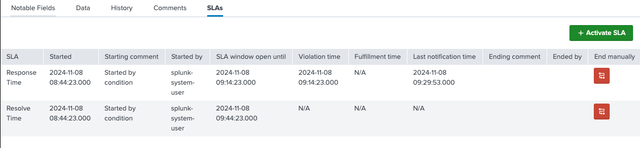
Add SLAs with this button:
| Button | Function |
|---|---|
Activate SLA |
Requires an AME subscription.