Workbench
The ElasticSPL Workbench allows running ad-hoc and saved queries using an interactive interface. In addition it is possible to save given input as a new query or update an existing query.
Requirements and Restrictions
To ensure an interactive experience, the Workbench is limited to a maximum of 10000 results.
Depending on the roles assigned to the user, the Workbench allows specific operations. The following table shows the available operations for each role.
| Role | Run Ad-Hoc Query | Load Query | Run Saved Query | Create Query | Update Query |
|---|---|---|---|---|---|
| elastic_user | ❌ | ❌ | ❌ | ❌ | ❌ |
| elastic_adhoc | ✅ | ❌ | ❌ | ❌ | ❌ |
| elastic_query_list | ❌ | ✅ | ❌ | ❌ | ❌ |
| elastic_query_run | ❌ | ✅ | ✅ | ❌ | ❌ |
| elastic_query_edit | ❌ | ✅ | ❌ | ✅ | ✅ |
| elastic_admin | ✅ | ✅ | ✅ | ✅ | ✅ |
It is possible to assign multiple roles to a user. The user will then be able to perform all operations that are allowed by the assigned roles. For example, a user with the roles elastic_query_list and elastic_query_run will be able to load and run saved queries but not create or update them. In addition, the user will not be able to edit the loaded fields as this would lead to an ad-hoc query.
Using the Workbench
Creating a Saved Query
To create a new saved query, the user must have the role elastic_query_edit assigned.
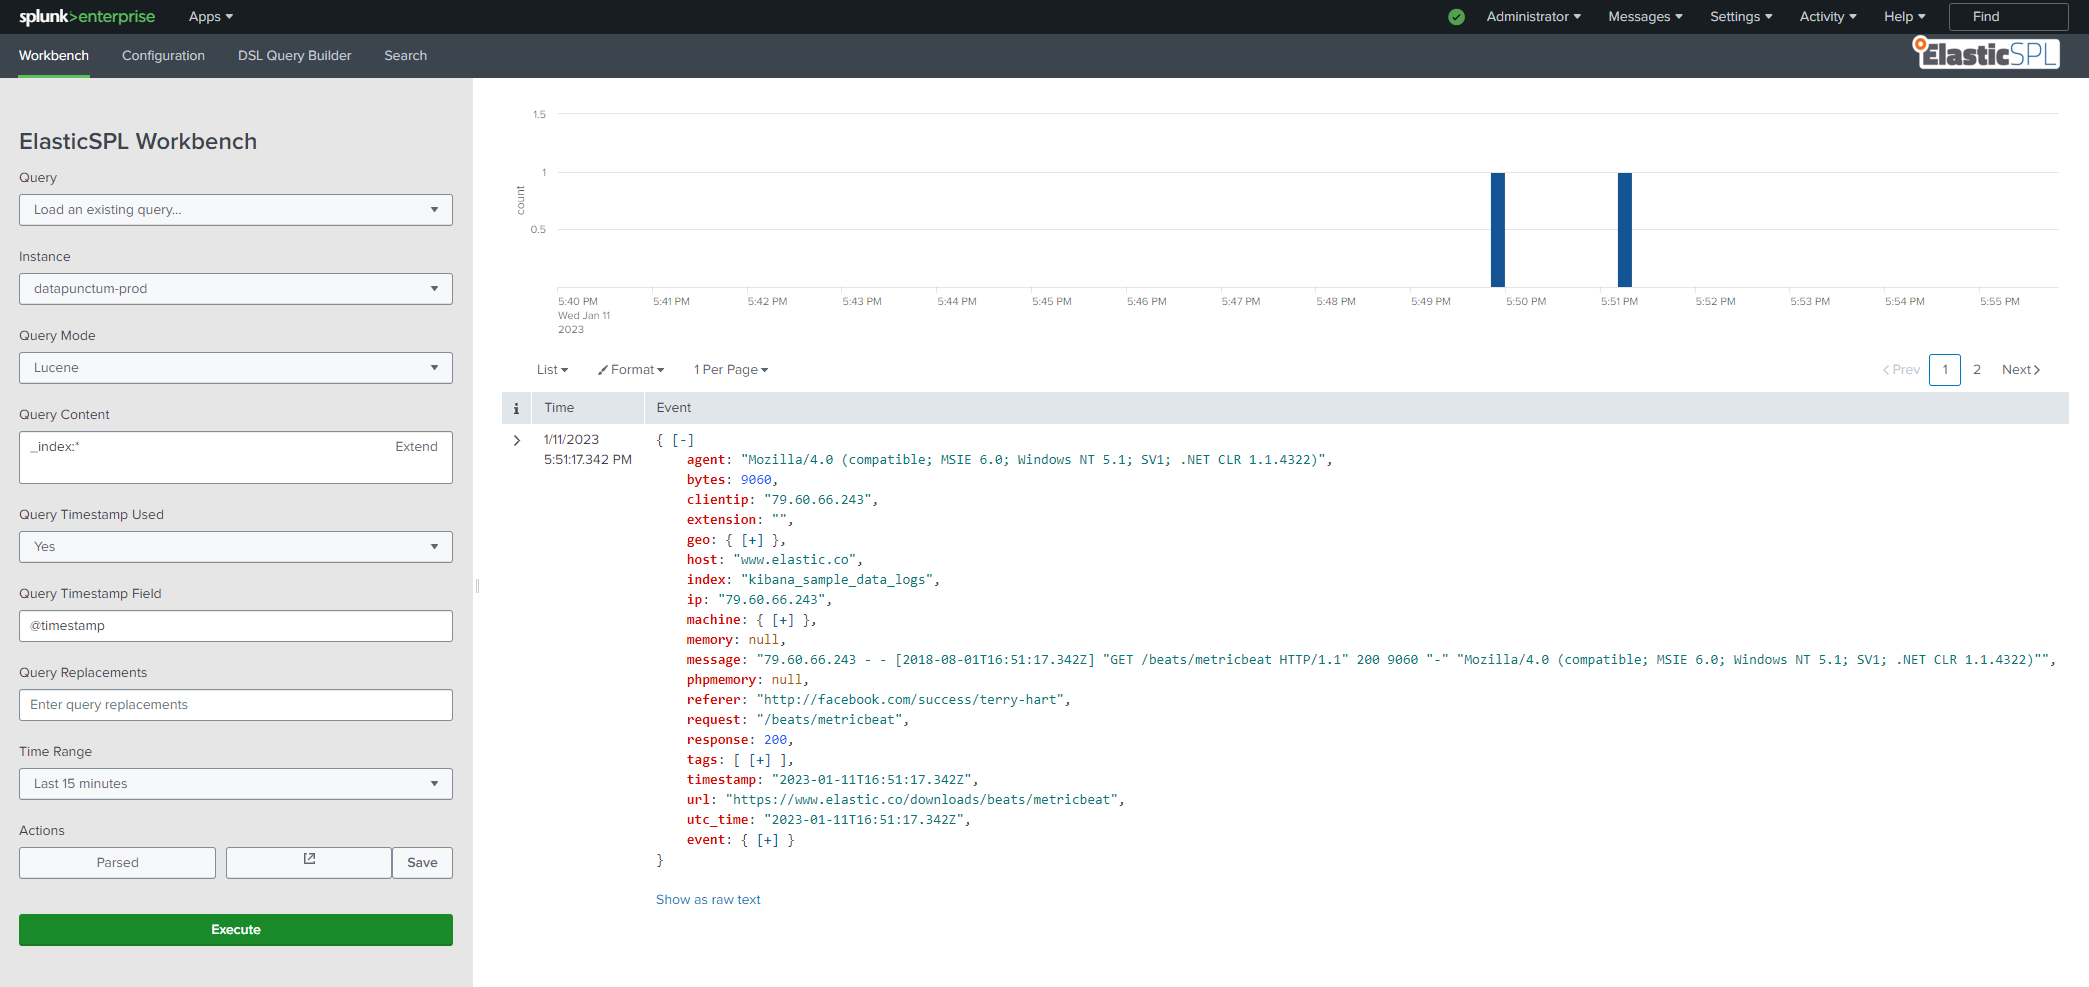
- Visit the Workbench page by clicking on the Workbench link in the navigation bar.
- Ensure that the
QueryDropdown is set toLoad an existing query..... - Select the mode you want to use for the query. The options are
Timeseries DSL,Aggregation DSLandLucene. - Enter the query in the text area
Query Content. If you are using theTimeseries DSLorAggregation DSLmode, you can use theDSL Query Builderto create the query. To better see large queries, you can use theExtendbutton to open a modal showing your query. Please take note that a parsed view of the query JSON is visible forTimeseries DSLandAggregation DSLqueries. - Enable or disable automatic time range limitation by using the
Query Timestamp Usedcheckbox. If enabled, the query will be limited to the time range specified in theTime Rangedropdown. If disabled, the query will be executed without any time range limitation. - If the data uses a different time field than
@timestamp, you can specify the time field in theQuery Timestamp Fieldinput field. - Replacements can be defined in
Query Replacements. The format is$key$=value. Multiple replacements can be defined by separating them with a comma. The replacements will be applied to the query before it is executed. - Click the
Savebutton to open theAdd Elastic Querymodal. Here you can specify the name of the query and the description. The name must be unique. - Select at least one role that is allowed to run the query in the
Rolesmultiselect. - Click the
Addbutton to save the query. If the button is disabled, some input is missing or invalid.
Feel free to test your query by clicking the Execute button. This will execute the query and display the results. If the query is invalid, the modal will show an error message.
Running an Ad-Hoc Query
To run an ad-hoc query, the user must have the role elastic_adhoc assigned.
Executing an ad-hoc query is similar to creating a new query. The only difference is that the query is not saved, only run. To run an ad-hoc query, follow steps 1-7 described in the section Creating a Saved Query and complete the following steps:
- Select on which instance the query should be executed in the
Instancedropdown. - Click the
Executebutton to execute the query. If the button is disabled, some input is missing or invalid. - The results will be displayed in the results section. Make sure to check if there are any errors or warnings shown in the top right corner of the results section. If there are, please check the query and try again.
After successful execution, the two buttons Parsed and Expand are enabled in the Actions section. The Parsed button will show the parsed query in a modal. The Expand button will open the just executed query in a new search page.
The query opened in the search page has two options max_results and scroll_size set to 10000. This is to ensure a reactive experience.
Running a Saved Query
To load and run a saved query, the user must have the role elastic_query_list and elastic_query_run assigned.
- Visit the Workbench page by clicking on the Workbench link in the navigation bar.
- Select the query you want to run in the
Querydropdown. - Select on which instance the query should be executed in the
Instancedropdown. - Click the
Executebutton to execute the query. If the button is disabled, some input is missing or invalid. - The results will be displayed in the results section. Make sure to check if there are any errors or warnings shown in the top right corner of the results section. If there are, please check the query and try again.
After successful execution, the two buttons Parsed and Expand are enabled in the Actions section. The Parsed button will show the parsed query in a modal. The Expand button will open the just executed query in a new search page.
If the current user has the role elastic_adhoc assigned, the input fields are enabled and the user can run a modified version of the query as an ad-hoc query. The modified query will not be saved.
The query opened in the search page has two options max_results and scroll_size set to 10000. This is to ensure a reactive experience.
Updating a Saved Query
To load and update a saved query, the user must have the role elastic_query_list and elastic_query_edit assigned.
Updating a saved query is similar to running a saved query. The only difference is that the query is not executed, only loaded. To update a saved query, follow steps 1-4 described in the section Running a Saved Query and complete the following steps:
- Edit any of the input fields in the sidebar.
- If you want to update the query, click the
Updatebutton to open theUpdate Elastic Querymodal. - Click the
Updatebutton to save the query. If the button is disabled, some input is missing or invalid.